How to set up your new Mac mini for use without a monitor
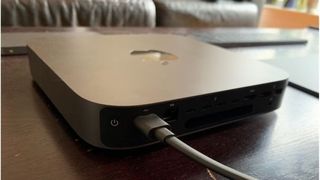
Have you bought a new Mac mini to serve as a network appliance? Perhaps it's to store files to your network, or it's going to run a Plex media server and share printers. In doing so, there's no need for a permanent monitor or keyboard/mouse combo. Whatever the purpose of the new Mac, here are the basics of running it without a monitor.l
Make certain the new Mac mini is properly configured
To set up the new Mac mini for use without a monitor and keyboard/mouse, you'll need to have it connected to, you guessed it, a monitor and keyboard/mouse. You can follow our new Mac setup guide if you need help getting things started.
In short, have your new Mac mini set up like a regular desktop, ready to go so we can configure some things locally before disconnecting peripherals like the monitor and keyboard.
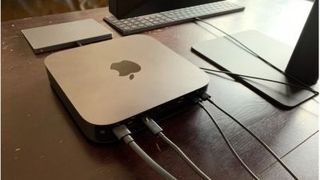
Screen sharing vs. remote management
Apple offers two methods of remotely connecting to your new Mac mini, screen sharing, and remote management. Screen sharing allows you to connect to the Mac mini and start a session whereby a view of the Mac mini's desktop becomes visible and accessible as if you are sitting right in front of a locally-connected display. Under this scenario, the connection is established via virtual network computing (VNC), so you'll have a direct link to your new Mac mini's desktop. Here you'll be able to install software, reboot, and run updates just like you usually would from a directly connected monitor setup.
Remote management offers the same accessibility as screen sharing and finer-tuned accessibility to the remote Mac. For example, it provides methods for installing, rebooting, and updating remotely connected Macs without direct desktop access and gives remotely accessible system alerts. System administrators typically use remote management in larger companies that want to administer a multitude of hardware from a single location.
In the following example, the focus is on screen sharing.
Turning on Screen Sharing
You must activate screen sharing to use it. Once you've set up this service, you'll be able to remotely connect and install or configure whatever you like without needing a monitor connected to the Mac mini or any of the best Macs.
Master your iPhone in minutes
iMore offers spot-on advice and guidance from our team of experts, with decades of Apple device experience to lean on. Learn more with iMore!
- Start System Settings on macOS 13 Ventura (or System Preferences in earlier macOS versions.)
- Click General.
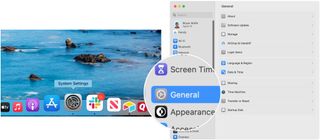
- Select Sharing.
- Toggle on Screen Sharing.
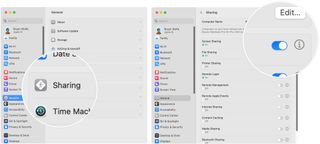
- If you want to connect from a non-macOS computer, click the information icon to the right of the Screen Sharing toggle.
- Click the Computing Settings button.
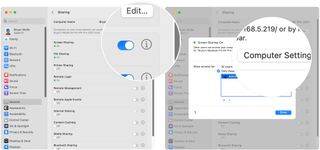
- Check VNC viewers may control screen with password then set a password for those machines to access the Mac mini.
- Click OK.
- If you need to specify certain users to have permission to connect to the Mac mini remotely, click Allow access for and add and remove users as needed.
- Click Done.
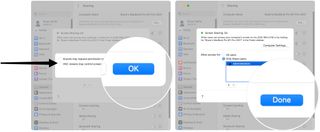
Your Mac mini is now ready to have the monitor and keyboard/mouse detached. Optionally, you can test your connection from a remote Mac before you do so.
Connect to your new Mac mini remotely
On a separate Mac, you'll be able to access Screen Sharing through the Finder.
- Choose Go > Network from the Finder menu bar.
- Double-click the Computer Name from step 3 in the "Turn on Screen Sharing" section above.
- Click Share Screen.
- Enter your User Name and Password when prompted.
- Click Sign In.
You'll now see your new Mac mini desktop ready at your command!
Final steps
You can now use the Mac mini's screen-sharing capabilities to continue to make changes and install software. Apple's built-in services like file sharing, printer sharing, and content caching are readily enabled by simply checking the appropriate box under the Share preference panel in System Settings. Once you're done, simply exit the screen-sharing application.
Keep in mind that screen sharing and remote management are an either/or option. If you feel the need to be able to remotely manage your Mac mini with the more advanced toolset under remote management, simply un-check screen sharing and check remote management under the Share panel in System Settings.
Additionally, ensure that you set the VNC password if you have non-macOS machines to connect to your new Mac mini. Happy connecting.

Bryan M. Wolfe has written about technology for over a decade on various websites, including TechRadar, AppAdvice, and many more. Before this, he worked in the technology field across different industries, including healthcare and education. He’s currently iMore’s lead on all things Mac and macOS, although he also loves covering iPhone, iPad, and Apple Watch. Bryan enjoys watching his favorite sports teams, traveling, and driving around his teenage daughter to her latest stage show, audition, or school event in his spare time. He also keeps busy walking his black and white cocker spaniel, Izzy, and trying new coffees and liquid grapes.
Most Popular


