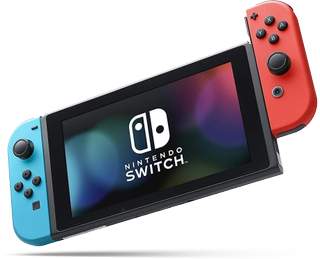
How to replace the outer shell on your Nintendo Switch
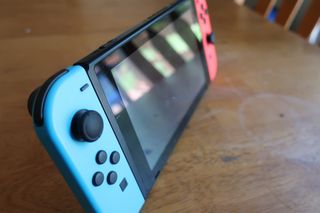
The Nintendo Switch comes in one color: grayish-black. The Joy-Cons come in other colors, such as red/blue, red/red, yellow, pink/green, and grayish-black. But perhaps you, like many, pine for the long-gone days of cool transparent Game Boy Colors or retro color schemes. Fortunately, there are a wide variety of third-party outer shells for Switches that you can swap yours out with.
Unfortunately, it's not as simple as slapping some stickers on it or putting it in a case. Replacing the outer shell on your Nintendo Switch takes time, work, and a lot of screwing and unscrewing of very tiny screws. The main case is fairly easy to do, but the Joy-Cons can be very difficult and require essentially dismantling the entire controller.
CAUTION: Doing this voids any warranty you have on your Switch. If you mess something up, you will not be able to get Nintendo to replace it for you. Proceed at your own risk.
If you're still intent on replacing the dull black cover with transparent, atomic purple or something, go get yourself a replacement outer shell for the parts you want to change, and follow our instructions.
Materials
You will need:
- Nintendo Switch
- Tri-wing screwdriver
- Small, Phillips-head screwdriver
- Small, flathead screwdriver (not necessary but can be helpful)
- New shell sans electronics for the main body of the Switch
- For the Joy-Cons, a new shell for each
- New buttons, if you want to replace them as well. You can replace a Joy-Con shell and use the same buttons, or replace them with different-colored ones.
Instructions
Especially if you're new to taking apart your Nintendo Switch, I highly recommend doing the Switch shell itself first before tackling the more difficult Joy-Cons. The Switch shell is relatively easy to remove and replace, and since the Joy-Cons already come in different colors, you can come out with a relatively attractive looking console for a minimal amount of effort.
Master your iPhone in minutes
iMore offers spot-on advice and guidance from our team of experts, with decades of Apple device experience to lean on. Learn more with iMore!
Make sure your console is turned off completely, your microSD card is removed, and both Joy-Cons are detached. You should also remove any stickers or decals you've already put on the Switch, as most of them cover the screws you'll need to get to.
There are lots of tiny screws involved in this process! Before you start, get some tiny bowls or dishes and label them with sticky notes for each part of the Switch, then place them carefully in the dish they go in. That way, you don't have screws rolling away and you can easily remember what to put where.
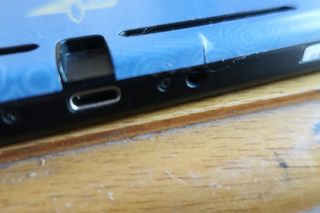
Begin by removing the four screws in the four corners on the back of the Switch, followed by the single screw on either side of the Switch (where the Joy-Cons usually attach), the one screw on the top of the Switch, and the two on the bottom next to the charging outlet. There's one last screw located underneath the kickstand above the microSD port. Remove that too.
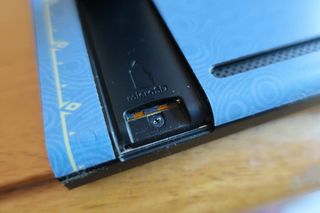
From there, remove the shell and flip it over. There are three screws that hold in a piece above the kickstand, and one that holds in the slot where games are inserted. Remove all these screws and the pieces they were holding in. From here, it's time to do it all in reverse.
Start by moving the plastic pieces from one shell to the new shell and screwing them in. Place the new shell on the back of the Switch itself, and screw it down in the reverse order you removed the screws. Ensure they are all in tight and you haven't missed any screws, then turn on your Switch and give it a whirl.
About the Joy-Cons
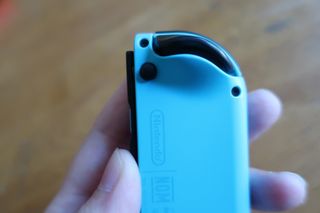
Replacing the Joy-Con shells is far more complicated, as it essentially requires removing every piece from the inside of the Joy-Con and screwing it in individually into a new shell. You start by removing the screws on the outside of the Joy-Con (there are three), opening up the back, and then individually unscrewing and removing each piece inside before putting it into the new shell. I highly recommend taking photos once you open up the Joy-Con, and again every time you remove a piece or two.
I also recommend starting with the left Joy-Con. The right Joy-Con takes a bit more time, as you have to make sure all the screws are tight enough for the buttons to be responsive, and you may have to unscrew and reattach it a few times to get it just right.
Use special caution when removing the ZL/ZR buttons. They have tiny springs attached to them that can fly off and cause trouble.
Even if you feel confident tackling the Joy-Con, a good video tutorial never goes amiss. Actually being able to see where the screws are and the order you must remove them in is a huge help, so take a look before, during, and after you replace Joy-Con shells to ensure everything is in the right place.
Help! There are too many tiny screws!
If you have detailed questions about how to replace the outer shell of a Nintendo Switch, please let me know in the comments!

Apple's major iPhone AI upgrade could have no cloud processing — initial wave of iOS 18 features "will work entirely on device"

Apple boots popular GameBoy emulator ‘knock-off’ from its iPhone App Store — Furious developer of the original decries Apple's App Review process

Want better iPhone photo quality without taking up lots of storage? You’re not using your 48MP camera properly unless you use this HEIF Max tip
Most Popular


