You may have heard that some people are experiencing issues with scratches on their Switch screen from taking it out and putting it into the Dock. There is very little wiggle room in-between the handheld device and the TV connector Dock, and if you're not careful, you might scratch it.
One simple way to solve this problem is with a screen protector, which is ... fine. Another way — and my personal favorite — is with a handmade Dock sock. It's a protective sleeve made from some kind of cloth that slips over the front panel of the Dock and protects your screen as you place and remove your Switch into it.
If you are crafty with a needle and thread, you can make yourself a customized Dock Sock for your Switch in just a few hours. I made mine while watching horror films on a Tuesday night. Here's how I did it.
What you'll need

You'll need a few crafting items to make this project. If you have a basic sewing kit lying around, you might have everything already and will only need materials specific to the project.
- Plain white paper (for making your pattern)
- A pen or pencil (for making your pattern)
- Scissors
- Embroidery needle (you need that slightly bigger needle to use with felt)
- Crafting felt in the colors you'll need for your project (I just got a couple of 9 x 12" sheets from a crafting store)
- Embroidery thread in complementary colors
- A piece of soft material for the backside of the sock (microfiber would be ideal, but I used an old t-shirt)
Make the pattern

Some people can eyeball a pattern and don't need to plan it out ahead of time, but I'm not one of those people. So, the first thing I did was draw out my idea on a piece of paper.
Once the basic idea was laid out, I then took a second piece of paper and made a pattern for each individual piece that would eventually need to be cut out of the felt. For example, I drew one shape for the light gray background of the D-pad and another shape for the black D-pad itself. I also made circles for the A/B buttons and rectangles for the Select/Start buttons, as well as shapes for their respective backgrounds.
The most important step is getting the full size of the sock correct — the material that will slip over the Dock itself. Lucky for you, I measured.
The front piece of the sock, the one made from felt, measures 4.125 inches high by 6.625 inches long (4 1/8 X 6 5/8").
The back piece of the sock needs to be slightly shorter because the inside of the Dock doesn't reach the bottom of the stand. The back piece, the one made from microfiber or another soft material, measures 3.125 inches high by 6.625 inches long, (3 1/8 X 6 5/8"). You'll also need an extra eighth of an inch on one long side and both short sides if you plan on hemming.
Note: If you are not using stretchy material on the back piece add an eighth of an inch on all sides to accommodate the thickness of the Dock panel. Microfiber or t-shirt material stretches, so this extra length is not necessary.
As you are drawing individual shapes, write down on each shape the color felt it is going to be cut from. For my pattern, the circles are red and the small rectangles are black, but the slightly larger rectangles are dark gray, while the biggest rectangle is light gray. It's important to note which shape goes with which color because when you cut out the pattern, it will be easier to know what goes with what.
After all of your shapes are drawn and have a designated color, cut out the shapes from your paper.

Then, pin each shape to the felt it goes with. Pinning the paper to the felt helps make cutting out shapes much easier.
Next, cut out all of the felt shapes you created with your pattern. Be careful not to lose those little pieces.
Sew together the felt pattern

The next step is to sew all of the pieces together. I recommend laying all of the shapes out in their respective spots to give you a basic idea of where they all go.
I use a basic running stitch to put all of my pieces together. If you are particularly handy with a needle, you could also try a backstitch for a more robust stitch pattern. As the layers get thicker, it gets more difficult to stitch, so keep that in mind when planning how you will sew your pieces together.
Just remember, the stitches will always be visible.
First, sew the topmost shapes on top of any small shapes that go under it. For my design, I sewed the red A/B buttons on top of the light gray squares and the black Select/Start buttons on top of the light gray triangles first. I also sewed the black D-pad on top of the light gray D-pad background.
Next, sew the smaller shapes to the larger shapes, and so on. For my design, after I sewed all the buttons to their backgrounds, I sewed those to the black inner layer of felt, then sewed the entire thing to the main front piece of the sock - the largest piece.
Sew the front to the back

Once the entire front of your sock is complete — all pieces are sewn to each other and then sewn to the main front piece of the sock — it's time to sew on the back.
Tip: I tried sewing the wrong sides together to create a finished hem, but quickly realized that crafting felt doesn't give as well as thinner material, so it's better to use a finished stitch around the edges instead of trying to hide the raw edges.
Pin the back piece to the front piece, right sides facing out, and leave the bottom open.
Because I couldn't hide the edges by sewing it together, wrong sides facing, I made a faux hem by folding in the edges of the material so it still looks finished. This is where that extra eighth of an inch comes in handy.
Using a blanket stitch, or some other attractive finishing stitch for the border, sew the two pieces together. Remember; don't sew the bottom.
Brag to your friends
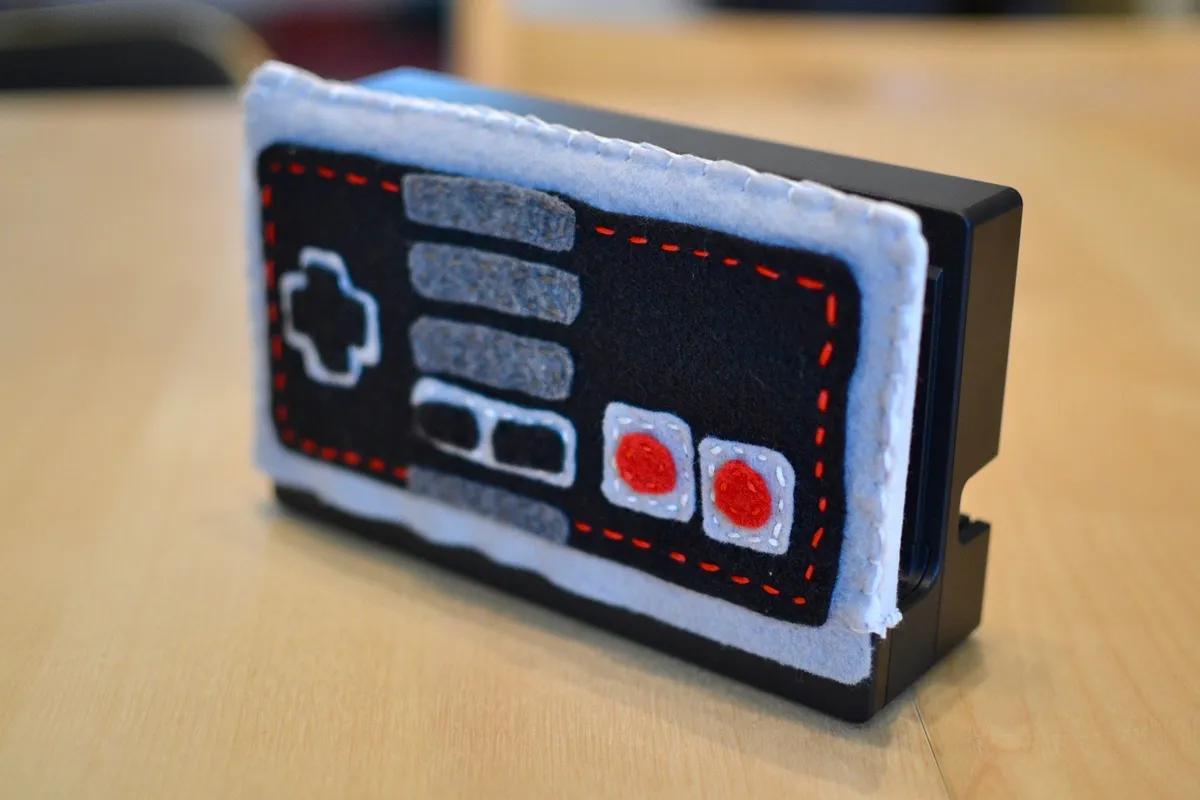
That's all there is to it. Slip that adorable Dock sock over the front panel of your Switch Dock and show it off to everyone. Instagram that baby. Tell everyone how clever you are for coming up with such a cute way to protect your Switch screen from getting scratched by your Dock. That's what I did.
Any questions?
Do you have any questions about how I made my Dock sock? And before you ask, no, I won't make one for you, not at any price. I'm just not crafty enough to make a business out of it.
If you've made any crafty accessories for your Switch, tell us about it in the comments, or show us pictures in the Nintendos Switch forums.