How to extract images frame by frame using ffmpeg on macOS


I've been playing around with photogrammetry environments. Although not being used in the traditional sense of making scientific measurements from photographs, I'm using the technique to make 3D digital representations of each room of my home. The goal is to be able to create a virtual version of my home that I can explore using my HTC vive on macOS.
When lots of photos are needed
As cool as being able to have a digital representation of my real world is, the process is a bit painstaking in terms of time. I need to take a lot (and I mean hundreds and hundreds) of photos in order to make an accurate and immersive representation of an objet or room. The more photos you take, the better and more realistic your 3D object will be.
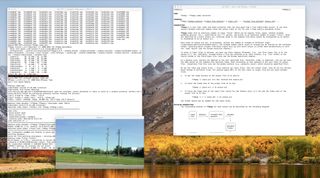
I had decided to shorten the number of photos I had to take. My plan was to take 4K video (using slow pans) of the room I want to digitize and then simply break up the video files into individual frames. Once I had the individual frames, I could then feed those photos into PhotoScan to stitch them together. The program I used to split the 4K video file into frames is called ffmpeg. And it's awesome.
ffmpeg
ffmpeg is a free and open source video "solution". It can, not only playback video and audio, but it can also manipulate those types of files in a number of ways. You can convert from one type of codec to another, switch containers, record media, and of course, split video files into individual images. It also happens to be at the heart of a number of well known media players and conversion tools like Kodi, HandBrake, Plex, and VLC. But we're going to use it in its raw form on the command line!
Getting ffmpeg
You can get ffmpeg directly from the maintainers, or if you have the macOS package manager "Brew" installed, you can simply install it by issuing the terminal command, brew install ffmpeg. For more information on how to get brew installed on your Mac, check out our how to install "brew" article.
Using ffmpeg
Once you've copied your video to your Mac you can call up ffmpeg in terminal.
- Open terminal.
- Change directory to where your video file exists. e.g. cd ~/Videos and hit enter.
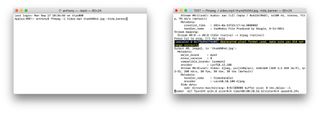
- Type ffmpeg -i video.mp4 thumb%04d.jpg -hide_banner.
- Hit enter.
- Then you'll have all of your individual frames in the same directory as your original video file.

More on ffmpeg
If you want to learn more about the capabilities of ffmpeg, you can check out the installed ffmpeg manual by typing man ffmpeg in the terminal application.
Master your iPhone in minutes
iMore offers spot-on advice and guidance from our team of experts, with decades of Apple device experience to lean on. Learn more with iMore!
Final comments
Do you have a better or faster way to split your video file frames? If you have something to add or if you have any questions, let us know in the comments.
Most Popular


