How to use visual and color accessibility options on your Mac

If you have particular sensitivities or color blindness, there are accessibility features on Mac that can help you get the most out of your experience. For example, you can invert colors, increase contrast, and more. These may be small things for the average person, but they can really make all the difference in the world when you have difficulty seeing.
Here's a look at the Mac accessibility options for the visually impaired. And if you're in the market for a new Mac, then check out our recommendations for the best MacBooks. They're fantastic at running macOS Monterey.
How to invert colors
- Click the Apple menu on the top left of your screen.
- Click System Preferences.
- Click Accessibility.
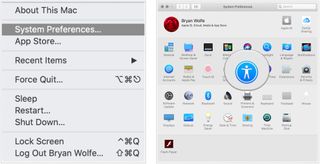
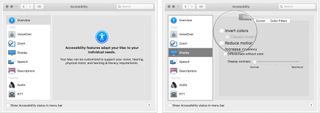
- Click Display in the menu on the left.
- Click the checkbox next to Invert colors.
How to switch to grayscale
- Click the Apple menu on the top left of your screen.
- Click System Preferences.
- Click Accessibility.

- Click Display in the menu on the left.
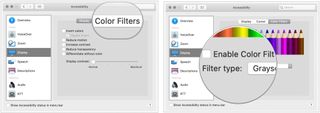
- Choose the Color Filters tab.
- Select the checkbox for Enable Color Filters.
- Choose Grayscale from the pulldown menu.
How to use shapes to differentiate some settings
- Click the Apple menu on the top left of your screen.
- Click System Preferences.
- Click Accessibility.

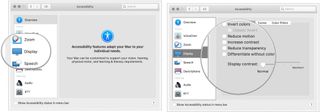
- Click Display in the menu on the left.
- Click the checkbox next to Differentiate without color.
How to reduce motion
Reducing motion on your Mac was added in macOS Sierra, and it makes animations more subtle. For instance, when you activate the dashboard, the windows jump instead of slide, and they crossfade back into place.
- Click the Apple menu on the top left of your screen.
- Click System Preferences.
- Click Accessibility.

- Click Display in the menu on the left.
- Click the checkbox next to Reduce motion.
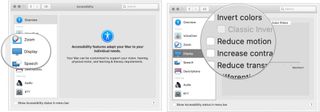
How to increase contrast
Increasing contrast on your Mac can help text stand out more clearly and help buttons and app icons appear more pronounced.
- Click the Apple menu on the top left of your screen.
- Click System Preferences.
- Click Accessibility.

- Click Display in the menu on the left.
- Click the checkbox next to Increase contrast.
How to reduce transparency
Reducing transparency using Mac accessibility options helps your Dock and desktop icons stand out more and makes the top menu bar opaque to see all your app icons and menu items.
- Click the Apple menu on the top left of your screen.
- Click System Preferences.
- Click Accessibility.

- Click Display in the menu on the left.
- Click the checkbox next to Reduce transparency.
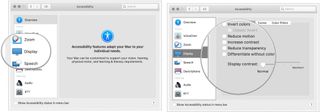
How to change the display contrast
- Click the Apple menu on the top left of your screen.
- Click System Preferences.
- Click Accessibility.

- Click Display in the menu on the left.
- Click and drag the slider next to Display contrast to increase or decrease.
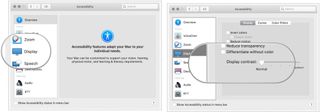
How to change cursor size and enable/disable shake mouse pointer to locate
You can also adjust the cursor size based on your preferences.
- Click the Apple menu on the top left of your screen.
- Click System Preferences.
- Click Accessibility.

- Click Display in the menu on the left.
- Click on the Cursor tab on the right side of the screen.
- Click and drag the slider next to Cursor size.
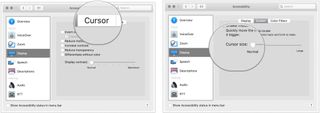
If you can't find your mouse cursor on your screen, you can enable the shake feature, and your mouse cursor will get more significant when you shake your mouse.
Master your iPhone in minutes
iMore offers spot-on advice and guidance from our team of experts, with decades of Apple device experience to lean on. Learn more with iMore!
To enable/disable shake mouse pointer to locate:
- Click the Apple menu on the top left of your screen.
- Click System Preferences.
- Click Accessibility.

- Click Display in the menu on the left.
- Click on the Cursor tab on the right side of the screen. 6.Choose the checkbox next to Shake mouse pointer.

What changes will you make?
As you can see, Apple makes it simple to make accessibility changes on macOS Monterey to suit your needs. If you're unsure which to use, try them one at a time for a digital test drive.
Updated May 2022: Updated for latest macOS version.

Bryan M. Wolfe has written about technology for over a decade on various websites, including TechRadar, AppAdvice, and many more. Before this, he worked in the technology field across different industries, including healthcare and education. He’s currently iMore’s lead on all things Mac and macOS, although he also loves covering iPhone, iPad, and Apple Watch. Bryan enjoys watching his favorite sports teams, traveling, and driving around his teenage daughter to her latest stage show, audition, or school event in his spare time. He also keeps busy walking his black and white cocker spaniel, Izzy, and trying new coffees and liquid grapes.
Most Popular


