How to set up a MacBook Pro and eGPU for VR
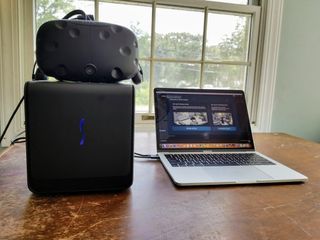
Apple's many, many hardware announcements during WWDC made one thing abundantly clear — 2018 will be the year VR comes to the Mac, and AR to the iPhone and iPad. To help prepare for the coming storm, Apple is offering VR developer kits with an eGPU box capable of driving the most intense experience on any Thunderbolt 3-capable Mac.
Here's what we've learned after spending a few days with one!
How to set up your Mac with Apple's VR Dev Kit
Apple's VR Dev Kit consists of a USB hub to convert a Type-C port to several Type A connections, the Sonnet eGPU Breakaway Box, a Radeon RX 580 GPU with 8GB of RAM, and instructions for connecting the box to your Mac's Thunderbolt 3 port.
Any Mac that supports Thunderbolt 3 and is running the latest High Sierra beta is compatible with Apple's kit; we're using the Late 2016 MacBook Pro (model A1708), which has an Intel Core i5 clocked at 2.3GHz and 8GB of RAM onboard.
Apple occasionally offers updates to iOS, iPadOS, watchOS, tvOS, and macOS as closed developer previews or public betas. While the betas contain new features, they also contain pre-release bugs that can prevent the normal use of your iPhone, iPad, Apple Watch, Apple TV, or Mac, and are not intended for everyday use on a primary device. That's why we strongly recommend staying away from developer previews unless you need them for software development, and using the public betas with caution. If you depend on your devices, wait for the final release.
We'll note that it is possible to buy these parts separately right now, but you'll be paying more than Apple charges for the $599 kit — largely due to difficulty in sourcing the exact graphics card Apple uses for this kit.
Is it possible to use a different graphics card? Yes, if the manufacturer offers compatible drivers, but it's often a complicated process. Here's our guide on doing so.
Master your iPhone in minutes
iMore offers spot-on advice and guidance from our team of experts, with decades of Apple device experience to lean on. Learn more with iMore!
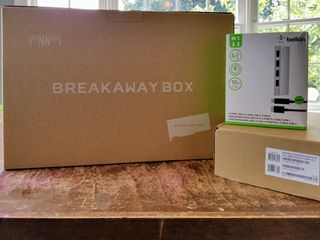
Setting this kit up couldn't be more simple. Here's how to do it:
- Make sure your Mac is running macOS High Sierra.Haven't installed the High Sierra developer beta yet? Here's how to install it on a development partition.
- Insert the graphics card into the Sonnet enclosure with a simple press-in and snap.
- Secure it with the included screws.
- Connect to power.
- Hook up a USB-C cable between the box and your Mac.
- Turn on the box. The card should be detected immediately.
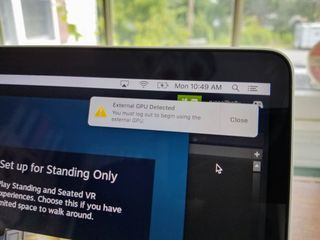
- macOS will ask to log out of the current profile to accept the new graphics card; do so.
- Log back in.
In theory, when you log back in, the card should be visible in your system profile. Success! Now all you need to do is... well, everything else.
Connecting your Mac to VR
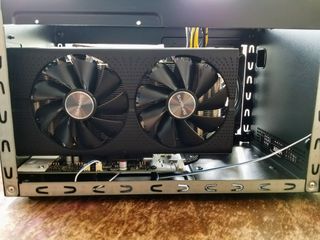
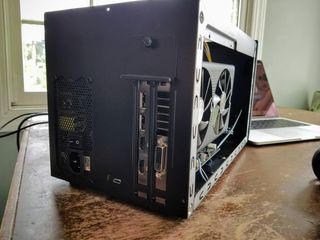
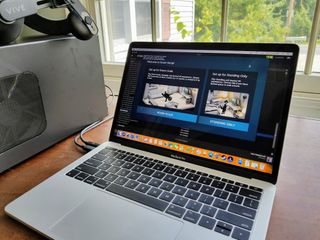
Connecting the HTC Vive to this machine means using its only other available USB-C port as a hub for USB-A ports, which concerned me initially since that port was already being used to power the laptop. I disconnected the power cable to connect the hub Apple provided and realized the Sonnet eGPU Breakaway Box was now also acting as the power source for this MacBook thanks to its 350W power supply included in the box.
I connected the Vive HDMI cable to the Breakaway Box and the Vive USB-A cable to the hub, and the Vive lit up to confirm it was connected.
Even as it is right now, this kit puts relatively little on the user to figure out in order to properly function.
The last step here is software. Steam for Mac already has SteamVR in Beta for macOS 10.11.6, but with the macOS Sierra beta, the HTC Vive behaves more like it currently does on PCs: As soon as SteamVR was enabled, the headset and controllers were immediately detected and I was ready to set up my virtual space.
All of this worked exactly as expected from the perspective of someone who has been using a Vive for the last year. The instructions are all the same, and when the setup was complete, I put the headset on and saw the same endless white room with grey lines I've seen thousands of times before. The controllers tracked flawlessly in front of me as expected, and I felt ready to jump into a game.
How to play VR games on the Mac... eventually
And here's where we pause for the moment, because there are, obviously, no games in SteamVR waiting for me to play right now. The whole point of this developer kit is to give developers the tools needed to bring new and existing VR experiences to SteamVR so that they can be enjoyed when macOS High Sierra officially launches in the fall. And good news for excited fans of VR: There are already several examples of developers hard at work to deliver quality VR experiences through this setup.
A promising start
Even as a developer kit, there's a lot about this experience to be impressed with.
Despite being a kit designed for a first developer beta, it puts relatively little on the user before it functions. And knowing Apple, this eGPU setup will simplify even further before it becomes available to the general public in early 2018. As great as the whole "bring your own GPU" setup is for a lot of folks, it's not hard to imagine Apple opting for something a little more plug-and-play for people who just want to turn their MacBook into a killer VR machine when they're at home.
I have the VR Kit from Apple all set up and ready to go on this MacBook Pro! So far everything works exactly the same as it does on the PC, and the Vive itself is just as smooth on this setup as anywhere else. What would you like to know?
Russell Holly
Our tests with this setup aren't going to stop here: You surely have questions, and we're here to answer them. Feel free to drop a line here in the comments, or head over to VR Heads where we'll be walking through developer demos as they become available and learning everything we can about how VR for Mac is going to work!
Russell is a Contributing Editor at iMore. He's a passionate futurist whose trusty iPad mini is never far from reach. You can usually find him chasing the next tech trend, much to the pain of his wallet. Reach out on Twitter!
Most Popular


